Halloween Witch Hat Cookies
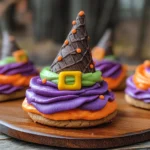
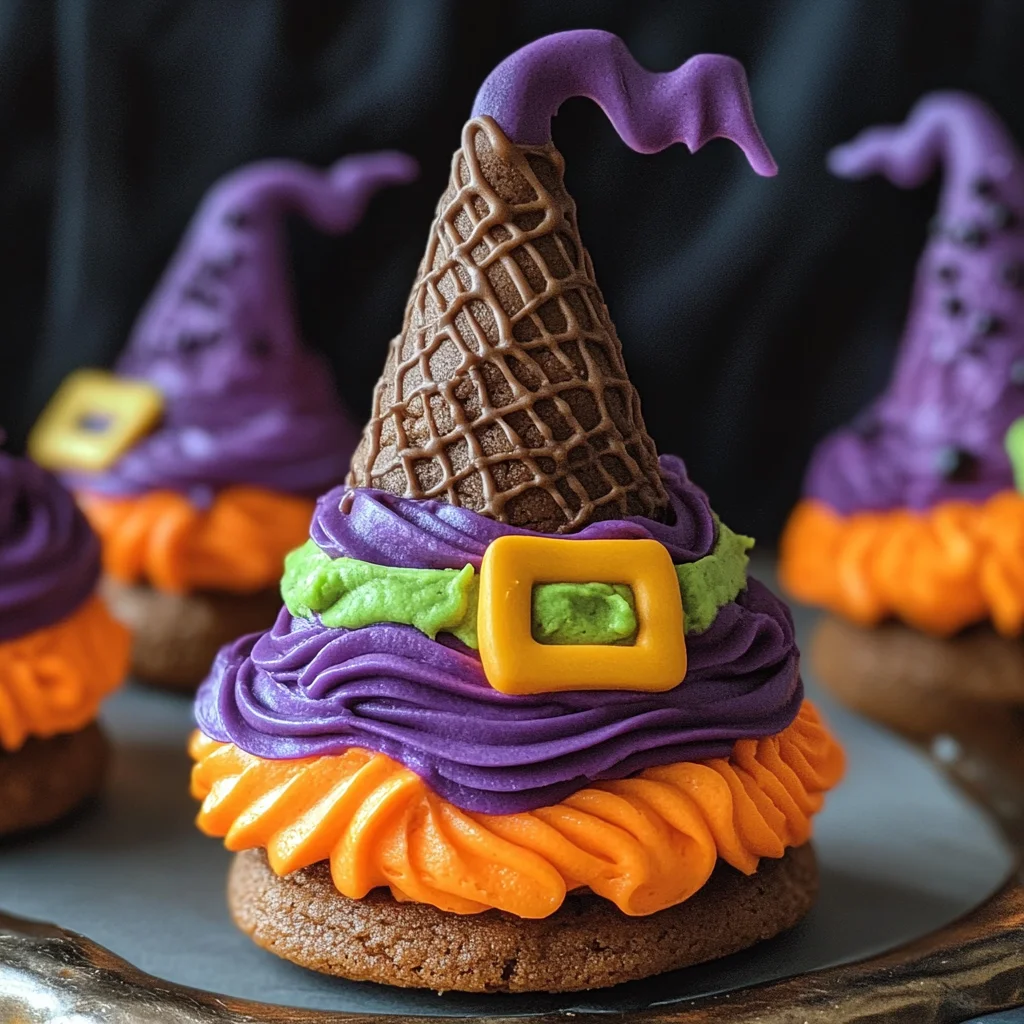
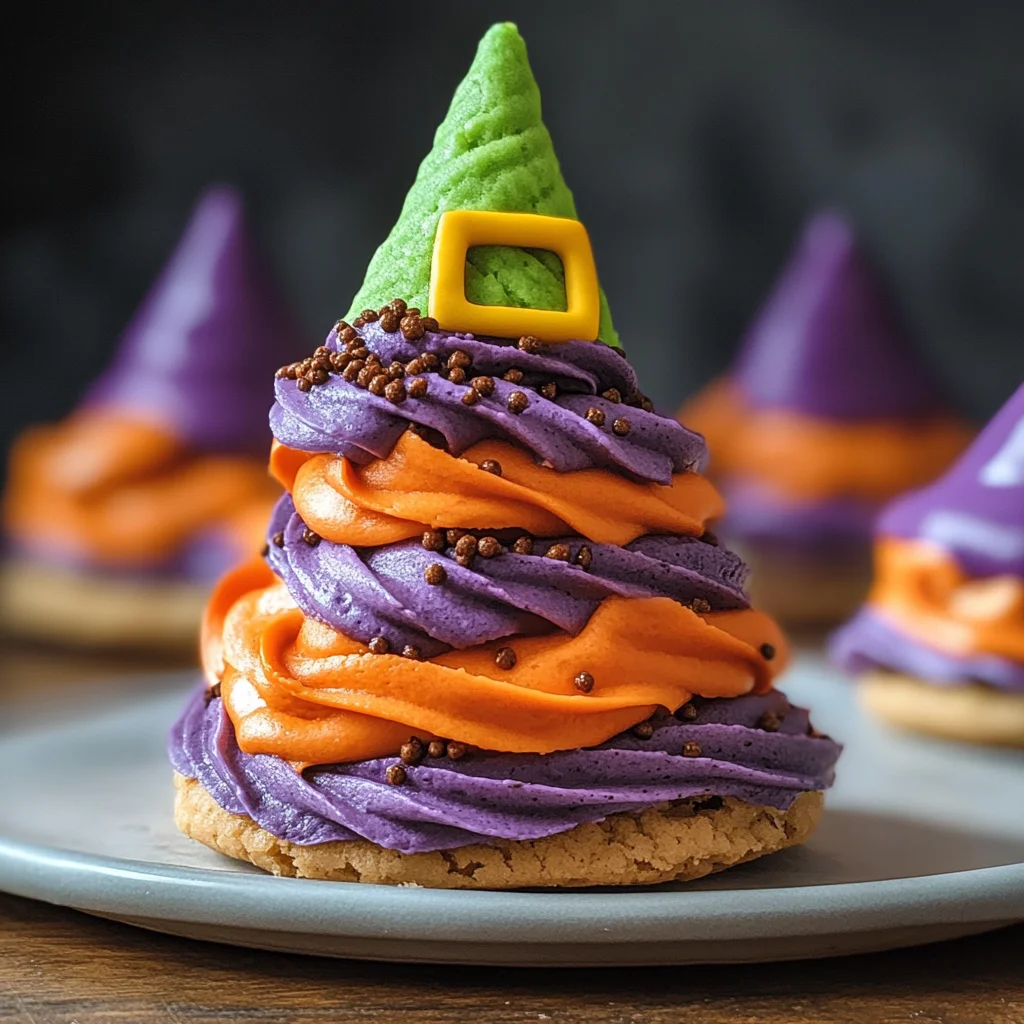
These Halloween Witch Hat Cookies are the perfect treat to impress your Halloween party guests. A delightful project to enjoy with kids, these chocolaty cookies are easy to customize and will surely be a hit with all the ghouls and goblins at your celebration.
Why You’ll Love This Recipe
- Fun for Everyone: Making these witch hat cookies is an enjoyable activity for kids and adults alike.
- Customizable Design: Use different icing colors and decorations to create unique hats that reflect your personality.
- Perfect for Any Occasion: These cookies aren’t just for Halloween; they can be made for birthday parties, school events, or any festive gathering.
- Delicious Chocolate Flavor: The rich chocolate cookies paired with sweet icing make for a mouthwatering treat.
- Eye-Catching Presentation: The whimsical design of these cookies adds a fun touch to your dessert table.
Tools and Preparation
Before you start making your Halloween Witch Hat Cookies, gather the essential tools. Having the right equipment will ensure that your baking process goes smoothly.
Essential Tools and Equipment
- Cupcake Cones Baking Rack
- Cookie Sheet
- Parchment Paper
- Decorating Bags
- Spatula
- Knife
Importance of Each Tool
- Cupcake Cones Baking Rack: This tool helps keep the sugar cones upright while baking, ensuring even cooking.
- Decorating Bags: These allow for precise icing application, making it easier to create beautiful designs on your cookies.
Ingredients
For the Cookies
- Favorite Cake Mix or Try Wilton’s Chocolate Cake Recipe
- Store Bought Chocolate Cookies or Try This Recipe from Wilton
For the Icing and Decoration
- Lemon Yellow Icing Color
- Black Color Mist Food Coloring Spray
- Rose Icing Colors Pink Food Coloring
- Violet Icing Color, Gel Food Coloring
- Golden Yellow Icing Color
- Orange Icing Color
- Creamy White Decorator Icing, 4 lb. Tub
For the Hats
- Sugar Cones
How to Make Halloween Witch Hat Cookies
Step 1: Prepare & Bake the Cones
- Prepare the cake mix following the chosen recipe’s instructions.
- Place the cupcake cones baking rack on a cookie sheet.
- Insert the sugar cones into the rack and fill each cone with about 2 tablespoons of cake batter.
- Bake and cool the cones according to the timing instructions provided in your recipe.
Step 2: Spray the Cones
- Trim any risen cake down to the top of each cone using a knife if necessary.
- Place the cones wide side down on parchment paper.
- Using Black Color Mist, spray each cone black.
- Allow them to dry for about 10 to 15 minutes.
Step 3: Tint the Icing & Prepare the Bags
- Tint 1 cup of creamy white decorator icing orange.
- Combine violet and rose icing colors to tint another cup of creamy white decorator icing purple.
- Prepare two decorating bags with tip 2B; fill one with orange icing and another with purple icing.
- Tint ¼ cup of creamy white decorator icing yellow by mixing golden yellow and lemon yellow colors, then place it in a bag with tip 3 attached.
Step 4: Assemble the Witch Hats
- Pipe a small amount of orange icing onto a cookie’s center, then place a cone on top.
- With the smooth side of tip facing out, pipe a band around half of the wide ends of cones; smooth it with a spatula.
- Repeat this process using purple icing on the other half of cookies and cones.
- Let them set for about 15 to 20 minutes before piping yellow tinted icing around each band as buckles.
- Allow them to set for another 15 to 20 minutes before enjoying your delicious creations!
How to Serve Halloween Witch Hat Cookies
These Halloween Witch Hat Cookies are not just a treat but a delightful centerpiece for your Halloween festivities. Here are some creative ways to serve these fun cookies.
At a Halloween Party
- Offer the cookies on a themed platter decorated with spider webs or fake spiders for a spooky effect.
- Arrange the cookies alongside other Halloween treats like pumpkin cupcakes or ghost-shaped marshmallows.
As Party Favors
- Package individual cookies in clear bags tied with orange and black ribbons for guests to take home.
- Include a small tag with a fun Halloween message for an extra touch.
On a Dessert Table
- Create a dessert table featuring these cookies along with other colorful desserts, using witch hats as the main attraction.
- Accent the table with themed decorations like mini pumpkins and candles to enhance the festive atmosphere.
With Hot Beverages
- Serve the cookies alongside hot chocolate or spiced apple cider for a cozy pairing.
- Consider offering whipped cream toppings to complement the sweetness of the cookies.
How to Perfect Halloween Witch Hat Cookies
To ensure your Halloween Witch Hat Cookies turn out perfectly, follow these helpful tips.
- Use Quality Ingredients: The taste of your cookies will be better with high-quality cake mix and icing.
- Control Moisture: Make sure your cake batter is not too runny; this helps maintain the cookie’s shape.
- Chill Icing Before Use: Chilling your icing can make it easier to pipe neatly onto the cones and cookies.
- Experiment with Colors: Feel free to mix colors for unique designs; creativity is key in making them visually appealing!
- Let Them Set: Allow adequate time for each layer of icing to set before moving on to avoid smudging.
Best Side Dishes for Halloween Witch Hat Cookies
Pairing side dishes with your Halloween Witch Hat Cookies can elevate your festive spread. Here are some great options:
- Pumpkin Soup – A warm, creamy soup that captures the flavors of fall, perfect for serving alongside sweet treats.
- Spooky Veggie Platter – Arrange carrots, celery, and bell peppers in spooky shapes or use cookie cutters for added fun.
- Witch’s Brew Punch – A refreshing drink made from fruit juices and sparkling water, served in cauldrons or spooky glasses.
- Cheese Platter – Offer an assortment of cheeses paired with crackers and grapes for a savory contrast to sweet cookies.
- Ghostly Popcorn Balls – Sweet popcorn balls shaped like ghosts make for a crunchy, festive snack option.
- Chocolate-Dipped Pretzels – These salty-sweet treats provide a delicious crunch that complements the soft cookies well.
- Mini Pumpkin Pies – Individual servings of pumpkin pie add classic autumn flavors to your dessert table.
- Caramel Apple Slices – Fresh apple slices drizzled with caramel sauce offer a fruity, sweet accompaniment that’s easy to grab and enjoy.
Common Mistakes to Avoid
Avoiding mistakes can ensure your Halloween Witch Hat Cookies turn out perfectly. Here are some common pitfalls and how to steer clear of them:
- Not following the recipe accurately: Always measure ingredients precisely and follow baking times. Adjustments can lead to undesired textures or flavors.
- Using stale ingredients: Check the freshness of your baking supplies, especially the cake mix and food colorings. Old ingredients can affect the taste and appearance.
- Skipping cooling time: Allowing cookies and cones to cool properly is essential. Skipping this step can result in melting icing or collapsing structures.
- Overloading on icing: While decorating, be mindful not to use excessive icing. Too much can make the cookies too sweet and difficult to handle.
- Neglecting decoration techniques: Practice piping skills separately before decorating your cookies. Improper techniques can lead to messy designs.
Storage & Reheating Instructions
Refrigerator Storage
- Store cookies in an airtight container in the fridge for up to 5 days.
- Separate layers with parchment paper to prevent sticking.
Freezing Halloween Witch Hat Cookies
- Freeze cookies in a single layer on a baking sheet for about 1 hour.
- Once frozen, transfer them to a freezer-safe container for up to 3 months.
Reheating Halloween Witch Hat Cookies
- Oven: Preheat to 350°F (175°C) and place cookies on a baking tray for 5-7 minutes until warmed through.
- Microwave: Heat individual cookies for about 10-15 seconds, checking frequently to avoid overheating.
- Stovetop: Place cookies in a skillet on low heat for about 2-3 minutes, turning occasionally.
Frequently Asked Questions
Here are some common queries regarding making Halloween Witch Hat Cookies:
How do I make Halloween Witch Hat Cookies more festive?
You can customize your cookies by using different colored icings or adding edible glitter for extra sparkle.
Can I use a different cake mix?
Absolutely! Feel free to experiment with any cake mix flavor that you enjoy.
How do I store leftover Halloween Witch Hat Cookies?
Store them in an airtight container at room temperature or refrigerate them if you prefer chilled treats.
Are these cookies suitable for kids?
Yes! These cookies are easy and fun to make with kids, allowing them to express their creativity while decorating.
Can I prepare these cookies in advance?
Definitely! You can bake the cookie bases and store them ahead of time, then decorate closer to your event.
What should I do if my icing is too runny?
If your icing is too thin, add powdered sugar gradually until it reaches your desired consistency for piping.
Final Thoughts
Halloween Witch Hat Cookies are a delightful treat that captures the spirit of the season. Their fun design allows for endless customization, making them perfect for parties or family activities. Give this recipe a try and unleash your creativity in decorating!
Halloween Witch Hat Cookies
Halloween Witch Hat Cookies are a delightful treat that adds a whimsical touch to your festive celebrations. Perfect for kids and adults alike, these chocolaty cookies topped with colorful icing and cone hats are not only fun to make but also a joy to eat. With endless customization options, you can create unique designs that reflect your personality, making these cookies a hit at any gathering. Whether for Halloween parties, school events, or simply to enjoy at home, these treats are sure to impress all the little ghouls and goblins.
- Prep Time: 30 minutes
- Cook Time: 15 minutes
- Total Time: 45 minutes
- Yield: Approximately 12 cookies
- Category: Dessert
- Method: Baking
- Cuisine: American
Ingredients
- Cake mix (chocolate or your favorite flavor)
- Sugar cones
- Creamy white decorator icing
- Food colorings (orange, purple, yellow)
Instructions
- Prepare the cake mix according to package instructions.
- Insert sugar cones into a cupcake cones baking rack and fill with batter. Bake as directed and allow to cool.
- Trim any excess cake from the cones and spray with black color mist; let dry.
- Tint the decorator icing with food colors; fill decorating bags.
- Assemble by icing cookies and attaching cones as hats, detailing with additional colored icing.
Nutrition
- Serving Size: 1 cookie
- Calories: 160
- Sugar: 12g
- Sodium: 95mg
- Fat: 6g
- Saturated Fat: 3g
- Unsaturated Fat: 2g
- Trans Fat: 0g
- Carbohydrates: 24g
- Fiber: 1g
- Protein: 2g
- Cholesterol: 15mg
